The hands have not been idle.

“Hourglass,” Weave-it Weaves, p 11.
I made this pretty square and followed the instructions to the T. (To the T? Did I make that up? I don’t think so . . .) But I’m not wholly satisfied with that extra long stitch in the middle. (However, if you like the idea of that long stitch being the sand that runs through the hourglass, you might not want to change it.) I know exactly why it’s there though.
And I figured out how to fix it.
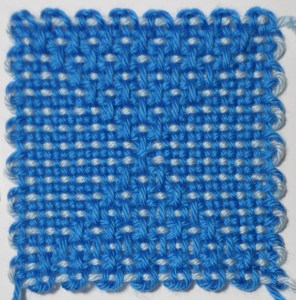
“Hourglass (modified).”
You have to get tricky during the warping process.
First, go to eloomanation.com and download, or open, the Weave-it Weaves PDF.
http://www.eloomanation.com/pdf/1938WeaveItWeaves.pdf
Print it and write this on page 11: Hourglass modified—Warp layers 1-3 as usual. If cutting after layer 3, unwind back to strand 16 (total number of vertical strands from layers 1 and 3) and thread under horizontal strand #8. Tie on next color and continue. If cutting after winding (4 3/4 times), go back then and thread under strand #8.
Then follow the directions for weaving as printed in the manual.
***Click on photo to see larger version. Click on back arrow to return to these instructions.
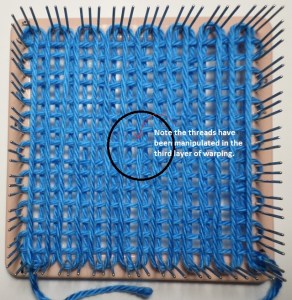
Photo shows how layer 3 has been modified.
Please note that because layer 1 was not altered, the two squares look the same on the back.

The reverse sides are identical.
Coming soon: a Sue Burton original, the Sunken Heart pattern stitch . . .

Sunken Heart

Sunken Heart with finished edge.


