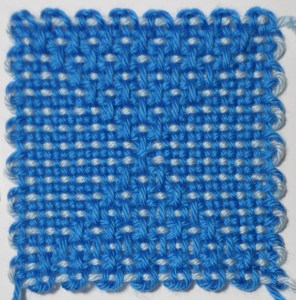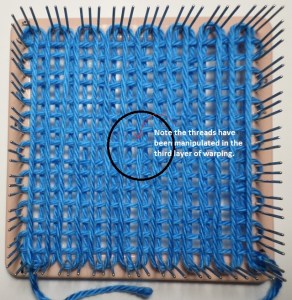
The 6-inch loom.
I recently built a 6″ loom and wove a nice square on it.

Finished square still on the loom.
Today I’m trying an 8″ actual PIN loom. I made the frame from 1/4″ foam core (I’d recommend slightly thicker, but I used what I had) and stuck sewing pins into it (Weave-it fashion). I marked the pin-placement plan on 1/8″ graph paper first and taped that on top of the foam core; stuck slender glass-head pins through the paper and into the foam core to make guide holes.

A man, a plan, a canal: Panama. OK, doesn’t make any sense, but it was in my head–had to let it out. Here’s the original design. I didn’t photo the whole process, but I hope I described it well enough.
(Remember: you can click on a photo to see a larger version; click the back arrow to return to this post.)

8-inch PIN loom. I used sewing pins with tiny or flat knobs on the ends. They’re various heights, but that doesn’t seem to matter.

A sideways look at it, in case anyone finds that helpful.
It feels like a disaster in the making, but I’m hoping it will turn out OK.
Decision #1: tie the yarn onto the loom instead of the pins. They seem a bit fragile.
Layers 1 and 2 warped with Caron Super Soft “Grape.”

Layers 1 and 2. Note: yarn is tied onto the loom, not the pins, at bottom left corner.
Layers 3 and 4 warped with Bernat Satin “Lapis.” (It’s called Lapis, but it’s really a very pale blue.)
Decision #2: unsure how many times to wrap the yarn around the loom to determine weaving length. Judging by my experience with the 6″ loom, it looks like a good rule of thumb is # of inches + 1 wrap. This is an 8″ loom, so 8 wraps + 1 = 9. But just to be on the safe side, I did 9 1/2 wraps. If I run out it’s no biggie, I can add more later (lesson learned on the 6″ loom).

9 1/2 wraps around the loom; cut yarn; thread 10″ needle. Note: second color and cut first color are tied together onto the loom at upper left corner.
Row 1: Plain weave across.
All righty, maybe one drawback is the super, super long yarn tail. Makes me wish I had a super, super thin shuttle. Nevertheless, as weaving progresses I know the tail will get shorter. It’s not too big a pain to pull all that length through.
Decision #3: what pattern stitch do I want? This loom has 67 stitches across which means I can do a 3-strand stitch 22 times and have one left over, or a 4-strand stitch 16 times with 3 leftover. I decide on the four-strand stitch.
Row 2 (and all rows thereafter, except the last row): P-3; O-3, U-1 (16x)

First four rows. Weaving is well underway, no casualties yet.
So far, so good. I have to modify my habits of leaning on the pins while I weave, and so forth, but I’m impressed. The loom is holding up nicely. However, I think this pattern is kind of small for a square this big. Of course a small pattern is fine in a square this size, but I’m thinking 8″ x 8″ could also carry off something much bolder than you’d put on a 4″ x 4″ loom. Not sure at this point how to plan this, but I’m thinking about it . . .

Always keep notes as you go along! You won’t regret it (unless you’re like me and forget, uh, to keep making them).
As weaving progressed, well, it didn’t. I discovered I’d made a mistake. Have to admit, that was a pain to take out because of the super long yarn tail. However, it was just the one mistake and once I sorted it out, everything was smoothish sailing.

Not super obvious, but the over-and-under-ing got a bit messed up in this corner. Had to take out a couple of rows to straighten it out.
Working along, about 2/3 of the way up, I discovered it was the side pins that began to jostle out of place. I was expecting the top and bottom pins to give me trouble, but they didn’t (till the very end). Perhaps I was overcareful with the vertical-row pins and that caused the horizontal-row pins to shift, but it wasn’t much and didn’t create any significant difficulties. I just had to be aware of the situation and take care with them.

A closer view of the condition known as Side-Pin-Shift. Didn’t cause any problems. It usually occurred at the site of needle entrance or exit.

Side-Pin-Shift also occurred lower down on the loom, but presented no problem to finishing the weaving. The pins could have been bumped out of place; it looks like they’re not shifting because of being under too much tension.
Taking a look at the bigger picture, I can see–as I hinted earlier–that this size square could easily accommodate both a background pattern and a medallion “picture” in its center. I was thinking a smaller square within the larger square or a diamond shape. Because this square is so large it wouldn’t be such a bother to change colors for the medallion feature.

I think a solid-color purple diamond would look nice with the simple patterned background.
It took a bajillion times longer to finish weaving this square than it does to make a 4″ x 4″–obviously. Reasons include: the long tail, learning to do something new, and being extra-careful not to wreck the equipment.
All went much better than anticipated, till I got to the last row. If you’re acquainted with pin loom weaving, you know that last row–the scrunched-in one–is the most difficult to fit in. As I wove this square I took special care to make sure I had enough loose-ish yarn for the top row, but working against the shifty pins was tough. I got most of the way across, then switched to a smaller needle to weave through the last few loops. Worked like a charm!

As you can see, there’s plenty of leftover yarn–that extra half wrap I included. I’m not worried about waste because I’ll probably use it to sew squares together later on. However, one could safely cut down to 9 1/4 wraps, I think.
I find I’m interested enough in exploring possibilities with this loom to construct a more stable one. Someday. In the meantime I might see if I can re-use this one.
Decision #4: to dismantle or not? How am I going to get the square safely off the loom?
I don’t want to dislodge the pins if I hope to use this loom again. Pulling them out and replacing them will make them looser and less capable of holding up for a second weaving.
First, untie the ends that are secured to the top and bottom left corners of the loom. Take a deep breath. Find the loosest corner of the weaving. Looks like the top right corner on mine. Push all sides of the square up near the top of the pins. Begin easing the square off at that loosest corner. (This is why I didn’t want to use flat-head pins, but I ran out of the other kind.) Hold your thumb under the work, lightly against the pins from the inside. This creates a slight counter-pressure as you lift the loops over the pin heads. Work your way gently around the loom, always going to the loosest spots to lift off.

Getting there . . .

Finished square framed by totally intact loom.

Finished, front view. Looks like even tension throughout. Very pleased with this effort, if I do say so myself.

Finished, reverse view (with ruler showing size).
Looks like we made it! Finished size is 7.5″ x 7.5″. I’m definitely going to try this loom again. It’s big enough to try freestyle weaving.


