I received a note today, written in Spanish, asking for clarification on a pattern I posted nearly two years ago: the “Diamonds Stitch” pattern weave*.

“Diamonds Stitch” square, still on loom
I don’t speak Spanish, so in order to understand and respond I had to employ Google Translator. I hope it worked. While I was figuring out what to say, I noticed the pattern was recorded in my old style of writing instructions, so I decided to update them. While I’m at it, I’ll also include more instructions on working in ends, along with instructions on improving the overall look of your squares—for those who care about such things.
So let’s start with the loom already warped up, with Row 1 (R1) in place. Please note: I almost always weave in ends as I go, so these instructions will often show the warp threads tied along the outsides of the pins. These Row 1 instructions don’t completely show that though.

Row 1 (R1) woven in plain weave—Under, Over . . .
Pull the needle through and look closely at the space between R1 and the pins. If you don’t pack this row in close to the pins, you’ll have loose loops there when you take the square off the loom.
Now that your first row looks good, let’s follow the pattern (updated format).
“Diamonds Stitch” (See Glossary for explanation of abbreviations)
R1: P (plain weave)
Even Rows: U1, O3, P3, O3, P4, U3, P4, O3, P3, O3, U1
Odd Rows: P4, U3, P3, U3, P5, U3, P3, U3, P4
R16: P
For the benefit of those who need these instructions:

R2: follow the stitches thus: U1, O3, P3, O3, P3, O1 (P3 + O1 = P4), U3, P4, O3, P3, O3, U1

If you’re working in ends as you go, this is what R2 looks like.
Row 3

R3—shown without worked-in ends

R3 shown with worked-in ends
I continued working in the ends as I wove. The tails for L1 are on the outside of the 1-3 side and 2-4 side pins. The L2-4 (color 2) tails get worked in later. In fact, about halfway through the weaving, I go back and work in the L2 tail.

Time to work in the L2, 2-1 side yarn tail.
Lift the color 1 loop that’s near Cr3 up off the pin.
Lift the color 2 loop up off the pin that’s near Cr1, untie it, and thread the needle. (You can also weave the needle in first before threading the yarn.)

This process may seem complicated—with all these photos—but it’s really pretty easy.

View of the color 1 yarn tail after snugging it at Cr1
Replace the beginning L1 tail (up near Cr3) and continue weaving.

L1 tails secure; L2 tail worked in
To work in the L4 tail—weave R16, then bring the needle Over the L1, 2-4 side tail, Under the first warp and continue following the R16 path of weaving. Exit the row as best you can through the conglomeration at Cr3.
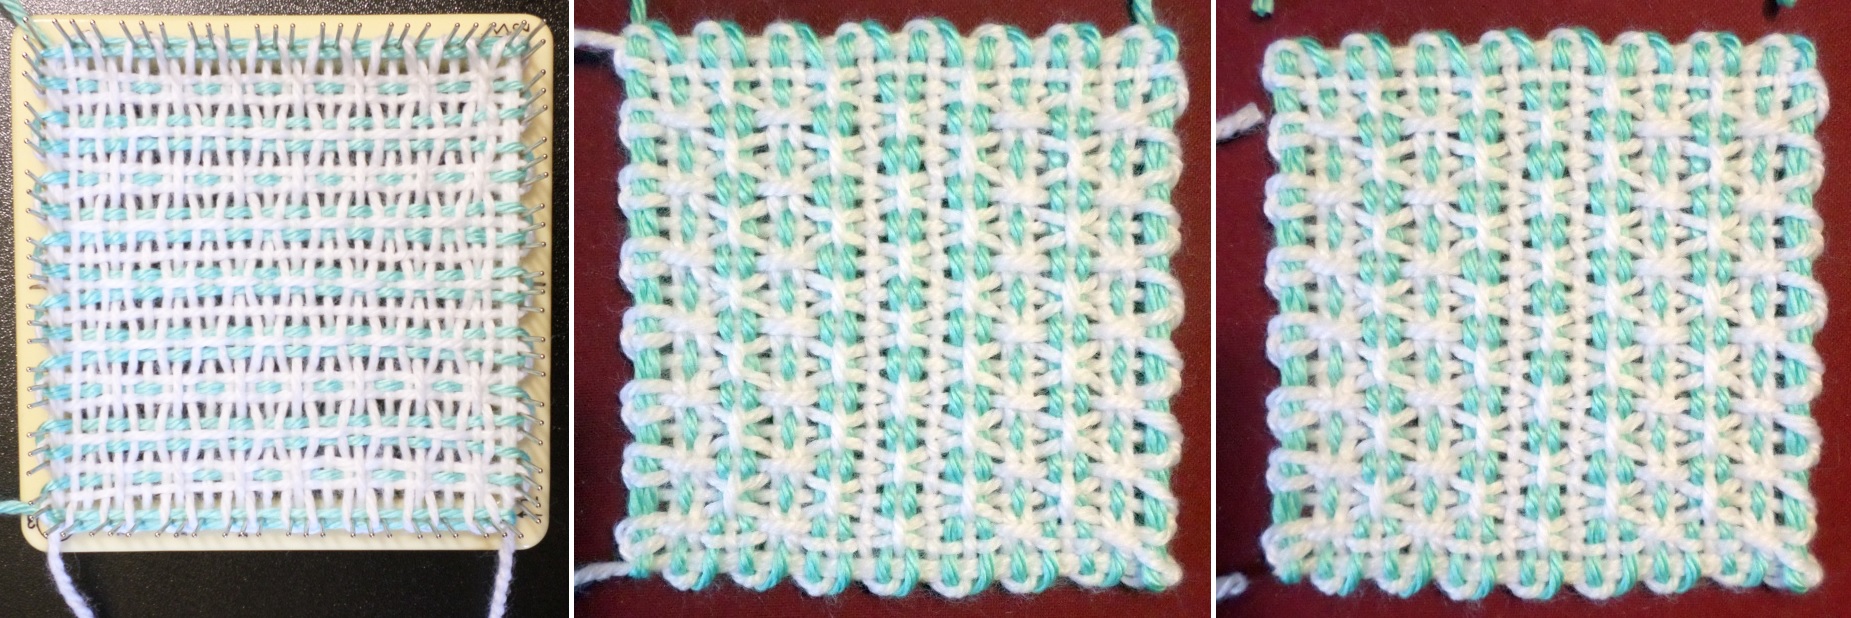
Remove the finished square from the loom and trim the ends.
One thing I’ve noticed lately as I’ve been working more and more with two colors, where L1 or L4 is a different color, the square seems to look better (fuller) if you use a slightly thicker yarn for the one-color layer. In the sample I demonstrated herein, I used Caron Simply Soft for both colors, but the square would have looked a bit different (maybe better) if I’d used Red Heart Soft for the one-color layer (as I did in the original post, see photo at the top of the page). It’s an individual preference. Two lightweight yarns will yield a lacier, lighter look. Using one thicker yarn will give your square a less lacy look.

Red Heart Soft is a slightly thicker yarn than Caron Simply Soft and might have been a better choice for L1 in this square.

Comparison of two finished squares
*Note to self: AKA “Alternating Dashes”
See this post for new variations on this pattern.