
Halloween approaches. I’m not a retail store. I didn’t start thinking about the holiday in June… or April… or last December. It just occurred to me a few days ago that I could make stuff other than pumpkins.
I thought I didn’t have any black wool yarn, but in my stash I discovered some black Romney wool I washed, combed, and spun myself a few years ago. It’s not solid black, but I prefer a little mix. I think it photographs better than solid black. For most of the demo photos I used a brown DK weight wool. I prefer 100% wool yarn for sculpted items because it yields itself more readily to being shaped than acrylic or an acrylic/wool blend.
Supplies
- 4″ square or 4″ triangle loom
- 1″ square loom
- Black wool yarn (worsted or DK weight)
- 2 weaving needles
- 1 sewing needle
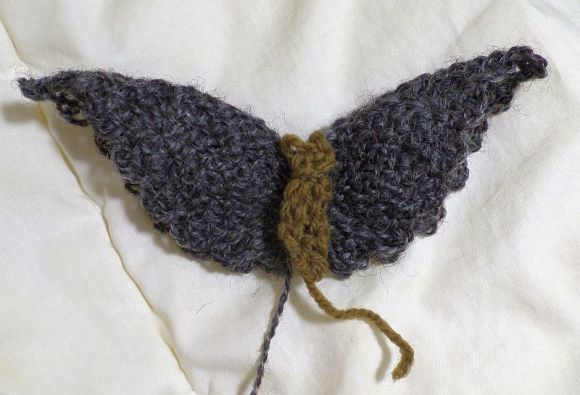
Weave either a 4″ square or 4″ triangle. I suggest leaving long yarn tails at the beginning and end for sewing purposes (4-6″). You can use a 4″ square and fold it over—as shown in the photo at the top—or you can make single-layer wings with a triangle loom. Whichever you choose, the preparation of the wings is essentially the same. If using a square, fold the square in half diagonally so Cr1 and Cr4 meet (tails meeting at the apex of the triangle).


If making a garland, you could stop at this point and just suspend wings from a string of lights or something. You could also cut a body shape out of felt and glue it on, or embroider something. If you want to add a woven body to the bat, here is a simple-ish way to do it.


You can use extra yarn tails as a hanger or work them into the wings.

If you want to experiment, a friend of mine made a bat using furry yarn. I would recommend trying the fur yarn on L4 only because it might otherwise be difficult to weave.

Depending on the yarn color you can also use the bat wing technique for butterflies or angel wings.