WEEK ONE
Amber from the Facebook Pin Loom Weaving Support Group https://www.facebook.com/groups/pinloomweaving/ suggested we host a weekly weave-along and she asked me to spearhead the project. I’ve never done a needlework-along before, but I said yes because it sounds like fun. After the death of my dog last week, I needed something to revitalize me and this is just the thing.
Last night I started organizing my mass of stuff.

Squares galore!
Turns out sorting squares–preliminary sorting–was pretty easy. The tough part was–and continues to be–identifying everything. My record keeping system has evolved from nil to efficient and all between; it spans three notebooks and several sheets of graph paper. Heh, heh. Now we roll up our sleeves.
And then there’s the part about CHOOSING one-and-only-one square to start with. I had a lot of ideas . . . In the end I decided to go with one I admired during sorting. Naturally I couldn’t find the instructions for it even though my notes said, “Dark green notebook, 31 May 2015, bottom of page.” There were no pattern instructions anywhere on the page that matched this square.
Luckily, I’ve learned how to figure out what I did. So I did.
Here’s the pattern: “Open Weave”
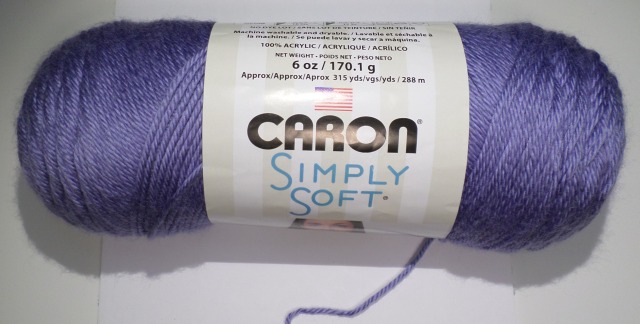
The finished sample was woven using Carron Simply Soft (CSS) “Berry Blue.”

“Open Weave” woven with CSS “Berry Blue”
***The photos following the pattern instructions should help as you weave the square. Remember, you can click on a photo to enlarge it; click the back arrow (upper left corner of this page) to return to these instructions. Please take a moment to look at the photos–hopefully they’ll help answer some questions.
Abbreviations:
P = Plain weave, i.e. under, over . . .
U = Under, i.e. go under the designated number of threads, e.g. “U-3” means to go under three threads
O = Over (see above)
Rpt = Repeat
R = Row (usually followed by a number, e.g. “R2” means Row 2)
(__) x __ = repeat the instruction within the parentheses the designated number of times, e.g. “(U-3, O-3) x 4” means to go Under 3 threads, then Over 3 threads four times; then continue the pattern.
Pattern Instructions:
R1: P
R2 (Even): P-2; (U-3, O-3) x 4; U-3, P-2
R3 (Odd): U-1, O-4; (U-3, O-3) x 3; U-3, O-4, U-1
Rpt these 3 rows, being sure to follow the Even instructions on *Even-numbered rows, Odd instructions on odd-numbered rows. End with R16: P
*Even numbered rows start on the left-hand side of the loom–the edge that extends from corner 1 up to corner 3 (AKA the 1/3 edge); odd rows are on the right side, or 2/4 edge. See this post for clarification of evens and odds: http://windsweptmind.com/2016/04/05/pin-loom-basics-corners-and-numbers-and-loops-oh-my/#more-2176
To help make it clearer, I’ll delineate the rest of the rows.
R4: P
R5: Rpt R3
R6: Rpt R2
R7: P
R8: Rpt R2
R9: Rpt R3
R10: P
R11: Rpt R3
R12: Rpt R2
R13: P
R14: Rpt R2
R15: Rpt R3
R16: P
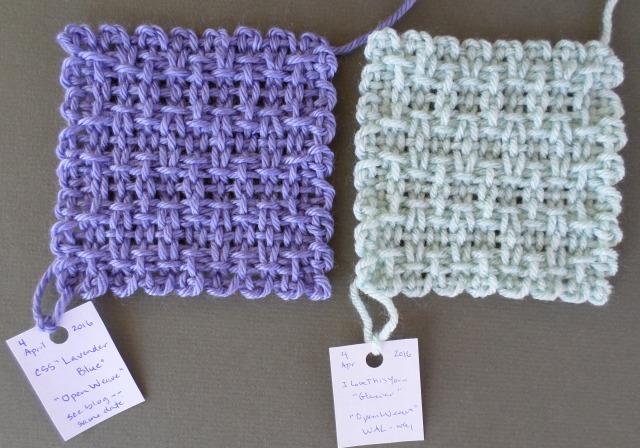
Sample #2 is made with CSS “Lavender Blue” yarn

CSS is not a springy yarn, so it’s necessary to warp the loom loosely. I always wrap the yarn five times around the loom; it leaves a longer tail which will be useful when you weave the last rows. Also, you can use the leftover tail for joining the squares.
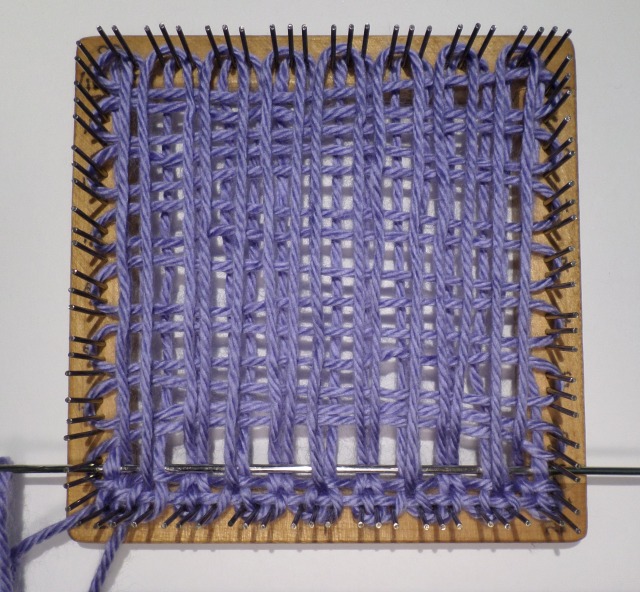
Photo shows R2 before pulling the needle through
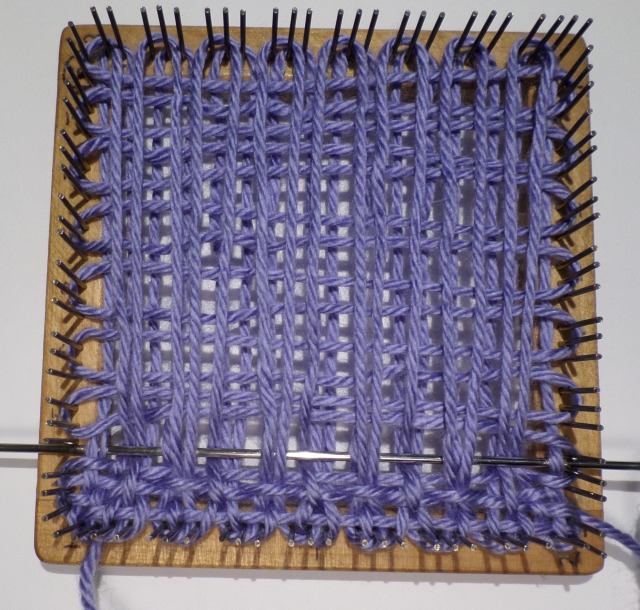
R3 is shown before pulling the needle through

When plain weaving R4, make sure to get the threads in the correct order. It helps to refer to the warping pattern at the top of the loom in order to get the threads in alignment.

Square is shown in progress
Third sample, on the loom . . .
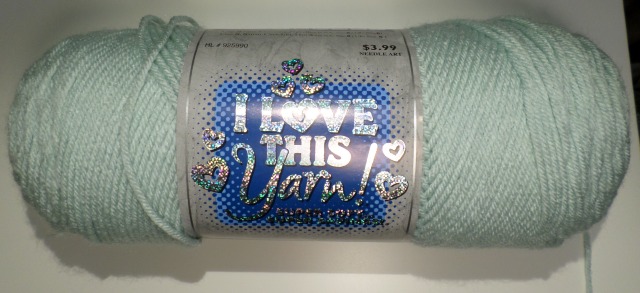
Sample #3 uses I Love This Yarn “Glacier”

I Love This Yarn–available at Hobby Lobby–is springier than CSS, so it’s not necessary to warp the loom quite so loosely. It’s also a heavier yarn, so the lacy look will be reduced.

These two squares–sewn into my first afghan–are woven in the “Open Weave” pattern. I tried to scatter the various patterns throughout the afghan, but somehow these two ended up edge to edge. At least you can see how they look in two different colors.
During the course of each week’s Weave Along, I’ll post other samples, so check back.
Update #1
Notice the labels on the finished samples below. It’s a good idea to keep a record of what you did. On the label I always list the date when I started–not finished–the square. That’s because it will show up on the start date in my notebook where I’ve written this same information and any comments I might also have recorded.
Finished samples with labels

Date, yarn make and color name, pattern name, and where to find the instructions
Also, the two squares are roughly the same size even though the yarns were slightly different weights. In fact, the lavender one is a titch larger–probably because I warped very loosely. Warping tension is something you’ll need to experiment with–different yarns require different tensions.

The more loosely warped lavender square is a hair larger than the pale green square even though the green yarn is a bit thicker.
Update #2: The Two-Color Challenge
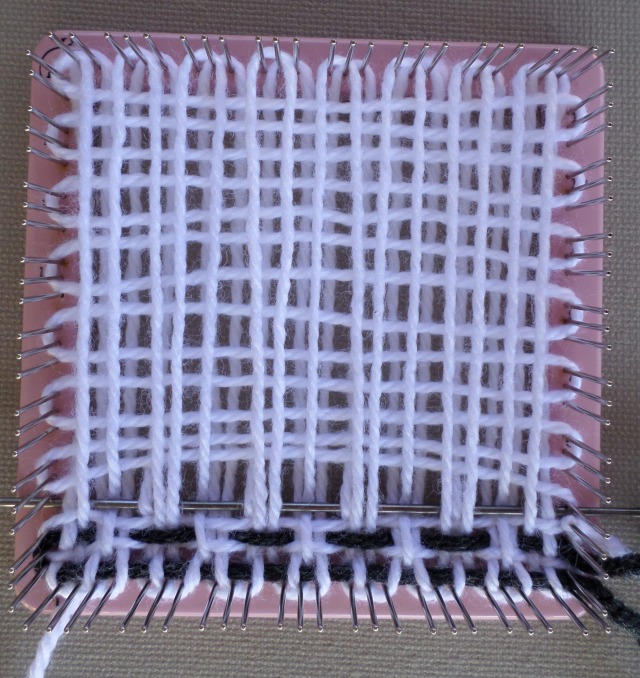
Ready for a challenge? Try making this square with two colors. If this is your first time using multiple colors, I recommend a 3/1 warp-and-weave: warp the first three layers with the main color, switch to the second color for the final weaving layer. Here are the instructions, demonstrated in black and white.
(You can look at this post for more instructions on preparing this particular square: http://windsweptmind.com/2016/04/05/pin-loom-basics-corners-and-numbers-and-loops-oh-my/#more-2176 )
Warp up the loom in three layers and tie off the end.

Layer three is in place. Yarn is tied off at corner 2

A close-up of the slip knot that anchors the final end of color 1 to the loom. It doesn’t matter which pin you tie it to–I like to keep it away from the corner since Row 1 is tricky to weave.
Add the second color. You can either tie the yarn to the loom or leave it unsecured–just be sure not to pull it all the way through after weaving R1.

Wrap second color five times around the loom, cut yarn, thread the needle and get ready to weave.
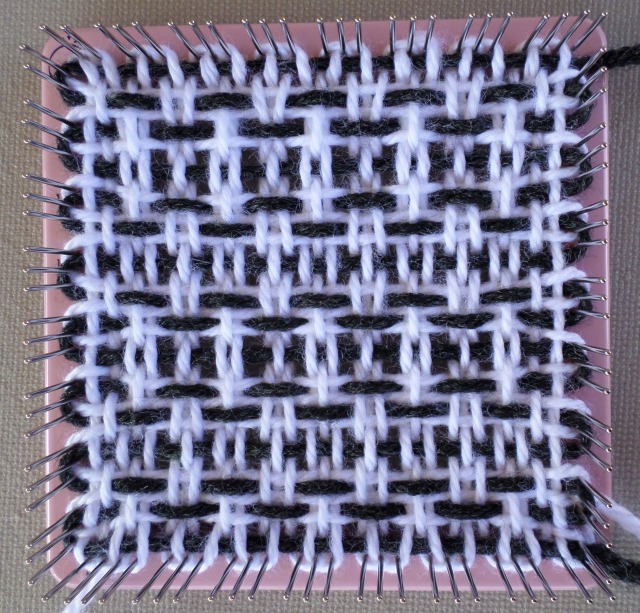
Follow “Open Weave” pattern instructions above, however, you may want to try this slight variation to the pattern (courtesy of Judie Eatough and Amber Vigil) on R3 and all Odd rows:
R3 (Odd): U-2, O-3; (U-3, O-3) x 3; U-3, O-3, U-2
I used this variation on the square and I can’t really tell a difference in the look of the pattern, but it was a little easier, visually, to go under 2 and over 3 than the way I originally wrote it. (This is one of my earliest patterns and I wasn’t sure what I was doing back then.)
Row 3 is shown with the variation and the needle still in place
The completed square still on the loom . . .
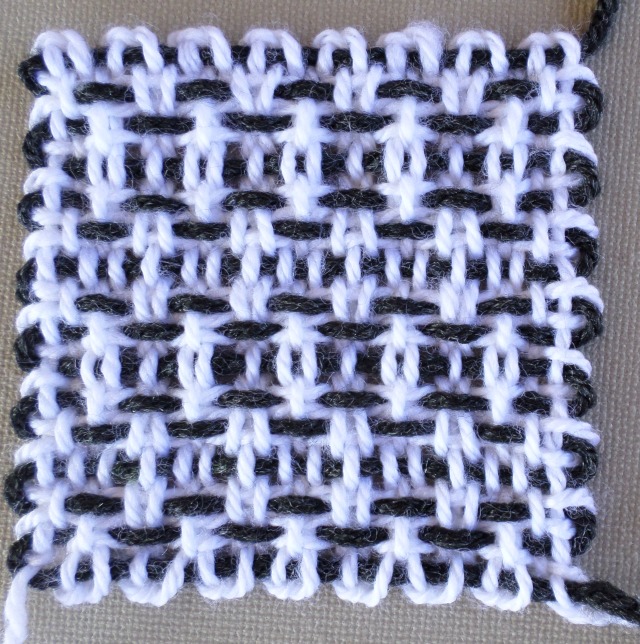
. . . and off the loom
Don’t forget to label your work! And check back for more updates and challenges.
Happy weaving!
Here are a few of the results from this week’s WAL. It’s beautiful. I’m so impressed with the creativity and dedication and artistry and gumption of our participants–from beginners to advanced!

Thanks to Amber Vigil for creating this lovely photo montage. That took some time!
Great! I have a bunch of yarn waiting for some project and I think I have found juist the thing!
4″ x 4″ pin loom squares take only 8 yards of yarn–2 yards per warping or weaving layer–so these are a great way to use up scraps.
This is a wonderful blog. Thanks for sharing your information.
Thanks, Karen! I wish I could keep up with all the things I want to blog about. It’s a toss-up between learning more stuff or writing about what I’ve already learned.