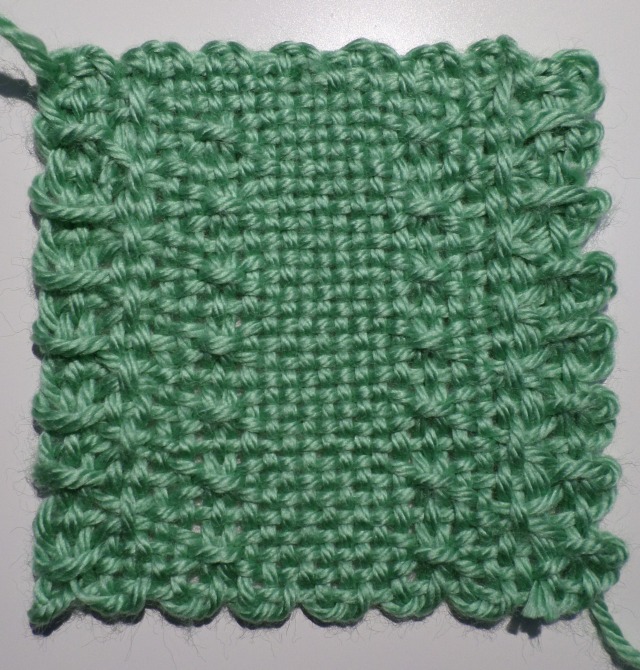
“Lattice Borders,” from the Weave-it Magic Squares booklet, is a simple and versatile pattern. It’s somewhere between an overall pattern and a picture pattern, and would make a great border design on a scarf or blanket. It looks great in single or several colors, but variegated yarn is not recommended as the details of the pattern will likely be lost.

“Lattice Borders”–single color; this sample originally featured a mistake in the pattern. It has since been corrected.
When I wove the sample pictured above, I made a mistake I didn’t notice till I took the square off the loom. “Rats!” I thought, planning to start over. Instead I went on to make the already warped two-color sample of the same square. While I wove I recognized the “blessing in disguise:” I could demonstrate how to fix a mistake in a square after it’s off the loom. Watch for that mini-tutorial later in this post.

“Lattice Borders” in two colors–warped L1 & 3: mc/L2 & 4: cc.
ABBREVIATIONS
L = Layer; this refers to the process of warping the loom. L1 is the first set of vertical strands; L2 is the first group of horizontal strands; L3 is the second group of vertical strands; L4 is the weaving layer.
mc = main color or first color used
cc = contrast color or second color used; cc-1 is the second color used; cc-2 is the third color used (see photo below)
If you don’t mind working in ends, you might find that using three colors in some patterns is worth the effort. “Lattice Borders” yields pay dirt when it comes to using multiple colors.

“Lattice Borders” in three colors: L1 & 2: mc/L3 cc-1/L4: cc-2
INSTRUCTIONS
Standard warping; five wraps for weaving L4.
When warping, try to anticipate how much take-up the weaving will create. Take-up refers to the undulation, or shortening, of the warp strands as you separate them with multiple rows of weft. You want the warp yarn not too tight, but also not too loose. This takes practice, so be willing to experiment. The looser your warp (within reason), the easier it is to weave. However, if it’s too loose the pattern’s details will not crisply emerge.

There should be a bit of play in the warped yarn, but it should not be sagging.
Nearing the end, it should still be easy to weave, but the warp strands are somewhat taut and the pattern is obvious.

With three rows left, weaving the needle through the warp should still be easy. Note how the pattern is clearly visible. (In hindsight, so is the mistake–top right, the row just below the needle.)
“LATTICE BORDERS” PATTERN
R1: P
R2 (and all Even rows): U-3, P-5, U-3; P-9; U-3, P-5, U-3
R3 (and all Odd rows): P-3, O-3; P-19; O-3, P-3
Rpt Even and Odd rows till
R16: P
Lattice Borders also looks nice warped: L1-3: mc/L4: cc. Not all patterns look good in all these color configurations, so Lattice Borders is a good ‘un.

Lattice Borders in two colors. L1-3: mc/L4:cc
MISTAKE FIX-IT TUTORIAL
Ah, the joy of the mistake! In most pin loom squares I don’t worry about mistakes. I either leave it as is or start over. Pin loom squares only use about 8 yards of yarn and they don’t usually take long to make, so mistake fixing is often more trouble than it’s worth. But you still want to know how to fix them.

Mistake–front view

Mistake–back view
Fixing the mistake requires replacing the flawed row with a new, correctly woven piece of yarn. Though my mistake is near only one end it’s better to replace the whole row than to have yarn ends dangling down the back.
Cut a piece of yarn significantly longer than the width of the square–about 8 inches.
Weave the long needle through the row, correcting the miswoven stitches. Use a crochet hook to separate warp threads as necessary so you can get the needle between them.

Start at the end where the mistake is so you have the most maneuverability of the needle.
Pull the needle through, leaving a tail of yarn on each side of the square; remove the needle.

Two strands of yarn temporarily occupy the same row.
Use the crochet hook to pull the incorrect row upward, away from the square. Double check to make sure you’ve pulled the appropriate strand, then cut it.

In the center of the row, pull a small loop up, away from the square. Cut the loop.
The hardest part is locating the loops on the outer edge of the square. Find them and pull the two cut ends outward.

It can be tough to find those outer loops, so if you think of it ahead of time (I didn’t), mark them with stitch markers or a scrap of yarn.
Now you have two ends on either side of the row and a single corrected row.

The corrected square with 4 extra ends to work in. Sigh.
Inspect the correct loop formation on the sides of the square and recreate it by working in two of the four ends. This will make joining this square to other squares easier. Work the other ends in away from the area where you worked the first two ends to avoid bulkiness.

Back of square before ends are worked in.
Back of square after ends are worked in.
SIMILAR PATTERNS
“Lattice Borders” from Weave-it Magic Squares, p 14, is also called “Woven Edge Stitch” in 100 Pin Loom Squares by Florencia Campos Correa, p 30
“Plain and Fancy” from Weave-it Magic Squares, p 6
“Clover Stitch” from 100 Pin Loom Squares by Florencia Campos Correa, p 27
“Textured Edge Stitch” from 100 Pin Loom Squares by Florencia Campos Correa, p 32
Weave 11 from Original Loomette Weaves, p 9
B-6 from The Loomette Handbook, p 7
Design 15 Bucilla Dictionary of Magic-Loom Weaving Stitches, p 8
With the exception of 100 Pin Loom Squares by Florencia Campos Correa, these pattern booklets, in PDF format, are found at eloomanation.com
Thanks so wonderful. You can be so creative with this little loom
It’s a neverending source of pleasure.
Sue,
Thank you so much for sharing the resources and your knowledge. Due to an upcoming move all of my other weaving equipment is not accessible so following along on the WAL has been a great stress reliever.
Sometimes you just have to sit down and weave! Glad the WAL could be of help.